User guide - Website Builder
Login to your MetroERP System. If you do not have your URL, please contact us at support@metrogroup.solutions for details of your account.
The first thing you should do is to change your password.
Please find a video on how to change your password here
https://youtu.be/ULwwUvS-a-c
To get more details on how to use the Website Builder, please do contact us at support@metrogroup.solutions
1) Go to the top left and click on the menu option.
![]()
2) Select the website module.
3) Click on " Go to Website " button.

4) Click on "
Edit
" on the top-right corner and start editing your website.
To get more details on how to use the Website Builder, please do contact us at support@metrogroup.solutions
1) Go to the top left and click on the menu option.
![]()
2) Select the website module.
3) Click on " Go to Website " button.
4) Click on " Pages -- Edit menu " from the header.

5) Next, a pop-up will be opened. Click on " Add menu item ".

6) Enter menu label (menu name) and url. [Here you need to set this page url. e.g, "About us" page url could be www.xyz.com/about-us, here you need to enter /about-us ].

7) Click on " Save ".
To get more details on how to use the Website Builder, please do contact us at support@metrogroup.solutions
1) Go to the top left and click on the menu option.
![]()
2) Select the website module.
3) Click on "
Go to Website
" button.
4) Click on "
Edit
" on the top-right corner and start editing your website.
5) Click on any place of header and in the right side, from " Style " section, you will see template option. From the dropdown select your favorite header.

6) Next, a pop-up will be opened which will ask your confirmation for changes. Click on " OK ".
7) Click on " Save " button on the top-right corner.
To get more details on how to use the Website Builder, please do contact us at support@metrogroup.solutions
1) Go to the top left and click on the menu option.
![]()
2) Select the website module.
3) Click on "
Go to Website
" button.
4) Click on "
Edit
" on the top-right corner and start editing your website.
5) Click on any place of footer and in the right side, from " Style " section, you will see template option. From the dropdown select your favorite footer style.
6) Next, a pop-up will be opened which will ask your confirmation for changes. Click on " OK ".
7) Click on " Save " button on the top-right corner.
To get more details on how to use the Website Builder, please do contact us at support@metrogroup.solutions
1) Go to the top left and click on the menu option.
![]()
2) Select the website module.
3) Click on "
Go to Website
" button.
4) Click on "
Edit
" on the top-right corner and start editing your website.
5) On the right-hand side, under " Block " section, you will see " Banner ". Just drag-n-drop to your main website section.

6) Click on any section of the banner and edit [e,g. change content etc..]
7) Click on the " Save " button on the right-hand side of the page.
To get more details on how to use the Website Builder, please do contact us at support@metrogroup.solutions
1) Go to the top left and click on the menu option.
![]()
2) Select the website module.
3) Click on "
Go to Website
" button.
4) Click on "
Edit
" on the top-right corner and start editing your website.
5) Drag-n-drop any block where you want to put image/icon.
6) Double click on the image section of the block.
7) Next, a pop-up window will be opened. Click on " Upload an image " button [If you want to add any photo or icon or video from your device. Please note: video file size should be less than 5mb].

OR
8) If you want to add YOUTUBE/VIMEO/DAILYMOTION etc.. video link then go to video section and add URL.

9) Once done, click on " Save " button.
To get more details on how to use the Website Builder, please do contact us at support@metrogroup.solutions
1) Go to the top left and click on the menu option.
![]()
2) Select the website module.
3) Click on "
Go to Website
" button.
4) Click on "
Edit
" on the top-right corner and start editing your website.
5) On the right-hand side, under " Block " section, you will see "P ricelist or Comparison ". Just drag-n-drop to your main website section.
6) Click on any section of the pricelist or comparison and edit [e,g. change content etc..].
7) Click on the " Save " button on the right-hand side of the page.
To get more details on how to use the Website Builder, please do contact us at support@metrogroup.solutions
1) Go to the top left and click on the menu option.
![]()
2) Select the website module.
3) Click on "
Go to Website
" button.
4) Click on "
Edit
" on the top-right corner and start editing your website.
5) On the right-hand side, under " Block " section, you will see " Image Gallery ". Just drag-n-drop to your main website section.
6) Click on any section of the Image Gallery and edit [e,g. change content etc..].
7) Click on the " Save " button on the right-hand side of the page.
To get more details on how to use the Website Builder, please do contact us at support@metrogroup.solutions
1) Go to the top left and click on the menu option.
![]()
2) Select the website module.
3) Click on "
Go to Website
" button.
4) Click on "
Edit
" on the top-right corner and start editing your website.
5) On the right-hand side, under " Block " section, you will see " Countdown ". Just drag-n-drop to your main website section.
6) Click on any section of the countdown and edit [e,g. change content etc..]. Also go to "Style" section on the right-hand side and change number of column/color/border etc...
7) Click on the " Save " button on the right-hand side of the page.

To get more details on how to use the Website Builder, please do contact us at support@metrogroup.solutions
1) Go to the top left and click on the menu option.
![]()
2) Select the website module.
3) Click on "
Go to Website
" button.
4) Click on "
Edit
" on the top-right corner and start editing your website.
5) On the right-hand side, under " Block " section, you will see " Google map ". Just drag-n-drop to your main website section.
6) Add API KEY.
7) Click on " Save ".
To get more details on how to use the Website Builder, please do contact us at support@metrogroup.solutions
1) Go to Google Cloud --> https://cloud.google.com
2) Create your account if account is not created already.
3) Click on navigation menu on the left-hand side and go to " API & SERVICES --> ENABLED APIs AND SERVICES ".
4) Click on the " + " button on the header and create a new project.
5) Click on " +ENABLE APIs & SERVICES ".
6) Select " MAPS JAVASCRIPT API ".
7) Click on " Enable ".
8) Click on navigation button.
9) Go to " Billing " and add your credit card and complete billing.
10) Once done, again click on navigation button and go to " APIs & SERVICES --> CREDENTIAL".
11) Under " API KEYS ", click on " SHOW KEY ". You will get your API KEY.
12) Add API KEY in the Google map pop-up in the website.
To get more details on how to use the Website Builder, please do contact us at support@metrogroup.solutions
To begin building your page on Metro Website, follow these simple steps:
1) Start by accessing the eCommerce dashboard and click on the "GO TO WEBSITE" option. This will take you to the Website page, as shown in the image below.
2) To manage your page, locate the Edit button at the top right corner and click on it. This will provide you with a default page and the necessary tools for designing your page.
3) Customize any element on the page by simply clicking on it. This allows you to tailor the content to your specific needs.
4) Utilize the different design tools available to make your website more attractive and inviting. Remember to save your changes regularly to preserve your current design.
5) Choose a theme for your website by dragging and dropping the structure blocks. Select a theme that aligns with the purpose of your website. Once you have chosen a theme, you can proceed to build the homepage.
6) After completing the design of your homepage, click on the SAVE button to save all the changes you have made.
7) To preview how your website will appear on mobile devices, click on the mobile preview button located on the top left side of the menu bar.
By following these steps, you can easily create a professional and visually appealing website using Metro ERP.
To get more details on how to use the Website Builder, please do contact us at support@metrogroup.solutions
Metro Website offers a highly customizable website solution, allowing you to tailor the look and feel of your website to your exact specifications. With our user-friendly interface, you can easily edit the menu and customize it according to your preferences. Our powerful customization features enable you to create a unique customer experience, ensuring that your website stands out from the competition. Whether it's adjusting colors, fonts, or layout, Metro Website provides the flexibility you need to create a visually stunning and engaging website.
To get more details on how to use the Website Builder, please do contact us at support@metrogroup.solutions
The Metro Website provides a high level of flexibility, allowing you to customize your website exactly as you desire. Unlike other platforms, such as Metro Website, where customization is limited, Metro Website gives you the freedom to fully edit and modify your website, including the menu options.
To get more details on how to use the Website Builder, please do contact us at support@metrogroup.solutions
On the Metro website, we showcase the default picture of our product. However, if you'd like to include additional angles or views of the product, we offer a carousel feature. This allows you to present various images for a more comprehensive view.
To get more details on how to use the Website Builder, please do contact us at support@metrogroup.solutions
To add dynamic content to your Metro Website, simply follow these steps:
1) Log in to your Metro ERP account.
2) Navigate to the "Website Management" section.
3 ) Select the page where you want to add dynamic content.
4) Locate the content block where you want to insert the dynamic element.
5) Click on the "Edit" button for that content block.
6) In the editor, look for the dynamic content icon (usually represented by a tag or placeholder).
9) View the dynamic content icon to open the dynamic content options.
9) Choose the type of dynamic content you want to add, such as a Form, Map, Events and Search..etc..
10) Customize the dynamic content to fit your website's design and layout.
11) Save your changes and publish the updated page.
By incorporating dynamic content into your Metro Website, you can enhance user engagement, provide real-time information, and deliver a personalized experience to your visitors.
To get more details on how to use the Website Builder, please do
contact us at support@metrogroup.solutions
To set the theme in Metro Website, please follow these simple steps:
1) Login to your Metro Website account.
2) Navigate to the "Settings" section of the dashboard.
3) Click on the "Theme" option.
4) Choose from a range of professionally designed themes tailored for your business needs.
5) Click on the theme that best suits your preferences.
6) Save your selection.
With Metro Website's intuitive theme customization options, you can effortlessly create a visually appealing and user-friendly interface that aligns with your brand image.
To get more details on how to use the Website Builder, please do
contact us at support@metrogroup.solutions
Setting up the layout in Metro Website is quick and easy. Simply follow these steps:
1) Log in to your Metro Website account and navigate to the website settings section.
2) Click on the "Layout" tab to access the layout customization options.
3) Choose from a variety of pre-designed templates or create your own custom layout.
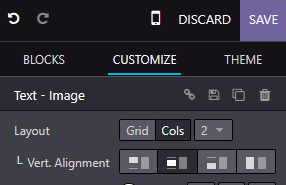
4) Customize the header, footer, sidebars, and content sections according to your preferences.
5) Arrange the elements on the page by dragging and dropping them into place.
6) Preview your changes to ensure they meet your expectations.
7) Save the layout and publish it to make it live on your website.
To get more details on how to use the Website Builder, please do
contact us at support@metrogroup.solutions
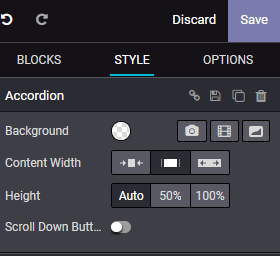
To set the height in Metro Website Builder, follow these steps:
1) Log in to your Metro Website Builder account.
2) Navigate to the page where you want to adjust the height.
3) Click on the design or layout settings option.
4) Look for the "Section Height" option.
5) Enter the desired height value in pixels or percentages.
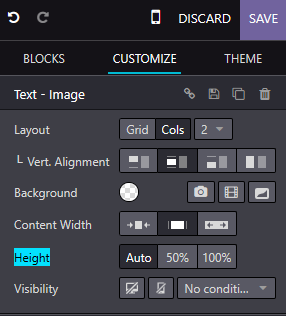
6) Save your changes and preview the page to see the updated height.
With Metro Website Builder's easy-to-use interface, you can customize the height of your website pages effortlessly, ensuring a visually appealing and engaging user experience for your visitors.
To get more details on how to use the Website Builder, please do
contact us at support@metrogroup.solutions
In Metro Website Builder, setting visibility for your website elements is a breeze. Follow these simple steps to ensure your website looks exactly how you want it:
1) Login to your Metro Website Builder account.
2) Navigate to the page where you want to modify the visibility of an element.
3) Select the element you wish to work with.
4) Look for the visibility settings option in the editing toolbar.
5) Click on the visibility settings option to expand it.
6) Choose the desired visibility option, such as "Visible to All," "Visible to Logged-In Users Only," or "Hidden."
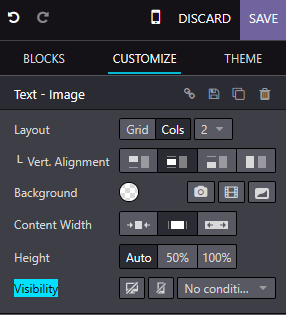
7) Customize the visibility further if needed, based on your requirements.
8) Save your changes and preview your website to see the updated visibility settings in action.
To get more details on how to use the Website Builder, please do
contact us at support@metrogroup.solutions
To activate Block Animation in Metro Website Builder, follow these simple steps:
1) Log in to your Metro ERP account.
2_Navigate to the "Website Builder" section.
3) Select the webpage where you want to add Block Animation.
4) Click on the "Edit" button to enter the editing mode.
5) Locate the block or element to which you wish to apply the animation.
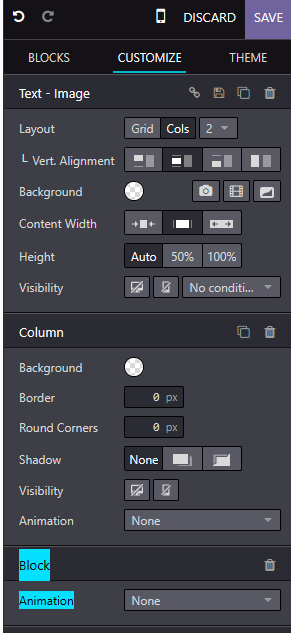
6) Click on the "Animation" tab in the editing toolbar.
7) Choose from a variety of stunning animation effects available.
8) Adjust the animation settings, such as duration and delay, to suit your preference.
9) Preview the animation to ensure it meets your expectations.
10) Save your changes and publish the webpage to make the animation live on your website.
To get more details on how to use the Website Builder, please do
contact us at support@metrogroup.solutions
To add a column in Metro Website Builder, please follow these simple steps:
1) Login to your Metro ERP account and navigate to the Website Builder section.
2) Choose the webpage where you want to add a column or create a new webpage.
3) Once you are on the desired webpage, locate the editing toolbar at the top of the screen.
4) Click on the "Layout" option in the toolbar.
5) Look for the column icon or the option that allows you to add columns to your webpage layout.
6) Click on the column icon and select the number of columns you want to add.
7) The columns will be automatically inserted into your webpage layout.
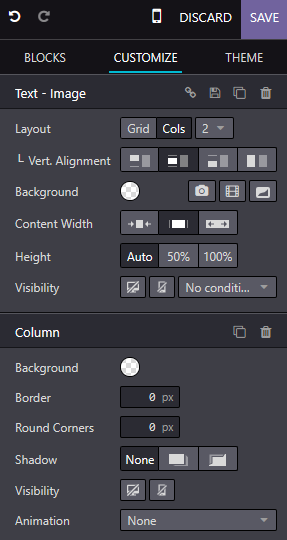
8) You can then drag and drop elements, such as text, images, or videos, into the columns to customize your webpage's content.
9) After adding the column, make sure to save your changes and preview the webpage to ensure it looks as desired.
To get more details on how to use the Website Builder, please do
contact us at support@metrogroup.solutions
Replacing the banner image on your Metro Website is a breeze! Follow these simple steps:
1) Log in to your Metro Website admin panel.
2) Navigate to the "Website Settings" or "Customization" section.
3) Look for the "Banner Image" option and click on it.
4) Choose the image you want to use as your new banner by either uploading it from your computer or selecting it from the existing image library.
5) Once you have selected the desired image, click "Save" or "Apply Changes" to update your banner.
By following these steps, you can effortlessly customize the appearance of your Metro Website by replacing the banner image with one that aligns perfectly with your brand and message.
To get more details on how to use the Website Builder, please do
contact us at support@metrogroup.solutions
Adjusting the content width on your Metro website is a simple process that allows you to customize the appearance and layout according to your preferences. To set the content width, follow the steps below:
1) Login to your Metro account and navigate to the "Settings" section.
2) Click on "Website Settings" to access the website customization options.
3) Look for the "Content Width" setting and click on it to expand the options.
4) Choose the desired content width from the available options or enter a custom value that suits your requirements.
5) Save the changes and refresh your Metro website to see the updated content width.
By adjusting the content width, you can optimize the display of your website's content, ensuring it looks visually appealing and professional. If you encounter any issues or require further assistance, feel free to reach out to our support team.
To get more details on how to use the Website Builder, please do
contact us at support@metrogroup.solutions
To set up inline text in your Metro Website, follow these simple steps:
1) Log in to your Metro ERP account.
2) Navigate to the "Website Settings" section.
3) Select the page where you want to add inline text.
4) Click on the "Edit" button next to the desired section.
5) Locate the text you want to make inline.
6) Highlight the text and click on the "Inline Text" option in the toolbar.
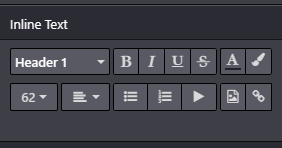
7) A pop-up window will appear, allowing you to customize the inline text properties.
8) Adjust the font, size, color, and other formatting options to your preference.
9) Once you are satisfied with the changes, click "Save" to apply the inline text to your website.
With Metro ERP's user-friendly interface, setting up inline text on your website becomes effortless, helping you create an engaging and visually appealing online presence.
To get more details on how to use the Website Builder, please do contact us at support@metrogroup.solutions
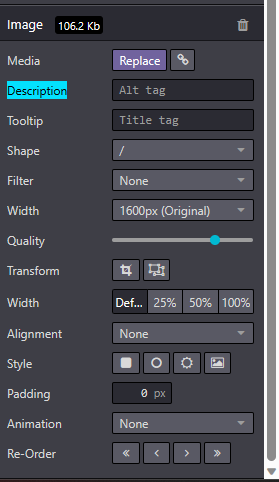
To add an Image Description in Metro Website Builder, follow these simple steps:
1) Login to your Metro ERP account.
2) Navigate to the Website Builder section.
3) Select the desired page where you want to add an image.
4) Click on the "Edit" button to open the page editor.
5) Locate the image you want to add the description to.
6) Click on the image to select it.
7) In the image settings panel, you will find an option to add a description.
8) Enter a relevant and concise description for the image, keeping in mind its purpose and relevance to your website content.
9) Save the changes and publish your website to make the image description visible to your visitors.
To get more details on how to use the Website Builder, please do contact us at support@metrogroup.solutions
Adding an Image Tooltip in Metro Website Builder is a simple process that enhances the visual appeal and interactivity of your website. To add an Image Tooltip, follow these steps:
1) Login to your Metro Website Builder account.
2) Navigate to the webpage where you want to add the Image Tooltip.
3) Select the element (such as an image or a button) to which you want to attach the Tooltip.
4) Click on the "Tooltip" option in the editing menu.
5) Choose the "Image Tooltip" option.
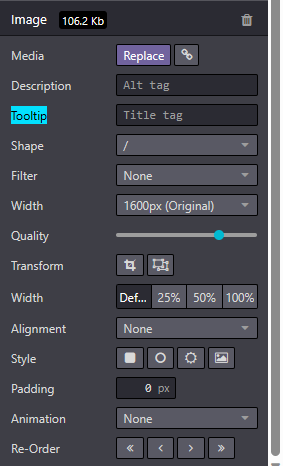
6) Upload the image you want to use as the Tooltip content. Ensure the image is relevant and visually appealing.
7) Customize the appearance of the Tooltip, such as its size, position, and animation.
8) Provide a brief and engaging description or caption for the Tooltip. This description will be displayed when users hover over the element.
9) Save your changes and preview the webpage to see the Image Tooltip in action.
To get more details on how to use the Website Builder, please do contact us at support@metrogroup.solutions
To set the background in your Metro Website, follow these simple steps:
1) Log in to your Metro Website account.
2) Navigate to the "Style" section of your Metro Website.
3) Look for the "Background" or "Appearance" option.
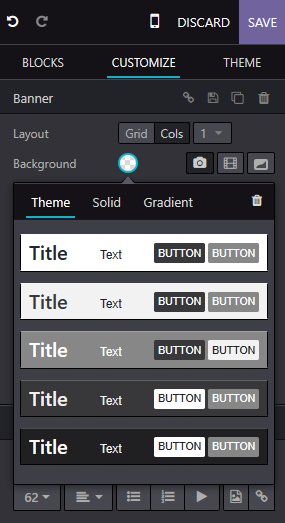
4) Click on it to access the background settings.
5) Choose from the available options, such as colors, images, or patterns.
6) Customize the background according to your preference by selecting the desired color or uploading an image.
8) Save your changes and preview your website to see the updated background.
To get more details on how to use the Website Builder, please do contact us at support@metrogroup.solutions
To facilitate product discovery on our website, we have implemented a robust product categorization system. Setting up product categories in Metro Website is a simple process. Here's a step-by-step guide:
1) Navigate to the e-commerce section of Metro Website.
2) Within the e-commerce category, you will find a "Create" button. Click on it.
3) A new window will appear, allowing you to create a new product category.
4) Fill in the necessary details such as the category name, description, and any other relevant information.
5) Save the category to finalize the creation process.
Once created, you can further enhance your product catalog by editing and adding additional categories as needed. This flexibility allows you to tailor the browsing experience for your customers and optimize their search process. If required, you can also remove categories that are no longer relevant.
To get more details on how to use the Website Builder, please do contact us at support@metrogroup.solutions
1) Go to the top left and click on the menu option.
![]()
2) Select the website module.
3) Click on "
Go to Website
" button.
4) Click on "
Edit
" on the top-right corner and start editing your website.
5) Click on any place of footer and in the right side, from " Style " section, you will see template option. From the dropdown select your favorite footer style.
6) Next, a pop-up will be opened which will ask your confirmation for changes. Click on " OK " .
7) Double click on the social media icon. Next, a pop-up window will be opened where you can add your social media URL.
8) Once done, click on " Save " button on the right-hand side of the page.
To get more details on how to use the Website Builder, please do contact us at support@metrogroup.solutions
1) Go to the top left and click on the menu option.
![]()
2) Select the website module.
3) Click on " Connect Google Analytics " button.
4) Next, a pop-up will be opened. Here you need to add your " GA Tracking ID " & " GA Client ID ".
5) Click on " Save " button.
To get more details on how to use the Website Builder, please do contact us at support@metrogroup.solutions
1) Go to the top left and click on the menu option.
![]()
2) Select the website module.
3) Click on " Go to Website " button.
4) Go to any page [e,g. Home page] for which page you want to set title and meta-description.
5) Click on " Promote --> Optimize SEO ".

6) Set your title at title section, meta-description at meta-description section, add keywords, ass image and check preview on the right-hand side.
7) Click on " Save " button.
To get more details on how to use the Website Builder, please do contact us at support@metrogroup.solutions
To manage website pages in Metro Website, follow these steps:
1) Select the website module.
2) Click on " Go to Website " button.
3) Add a page name and URL for your new page.
4) I n the "Publish" tab, you can set the page's visibility to "public".
5) You can also choose whether to set it as the home page or control its position on the website.
By using Metro Website, you can easily create and customize pages for your website.
To get more details on how to use the Website Builder, please do contact us at support@metrogroup.solutions
1) Go to the top left and click on the menu option.
![]()
2) Select the website module.
3) Click on " Go to Website " button.
4) Click on " Edit " on the top-right corner and start editing your website.
5)
5) On the right-hand side, under "
Block
" section, you will see "
Text Block
". Just
drag-n-drop
to your main website section
.

6) Click on any section of the block and edit [e,g. change content etc..].
7) Click on the " Save " button on the right-hand side of the page.
To get more details on how to use the Website Builder, please do contact us at support@metrogroup.solutions
1) Go to the top left and click on the menu option.
![]()
2) Select the website module.
3) Click on " Go to Website " button.
4) Click on " Edit " on the top-right corner and start editing your website.
5) Select the desired block where you want to align the text.
6) Within the block settings, locate the text alignment options. They are usually represented by icons or buttons.
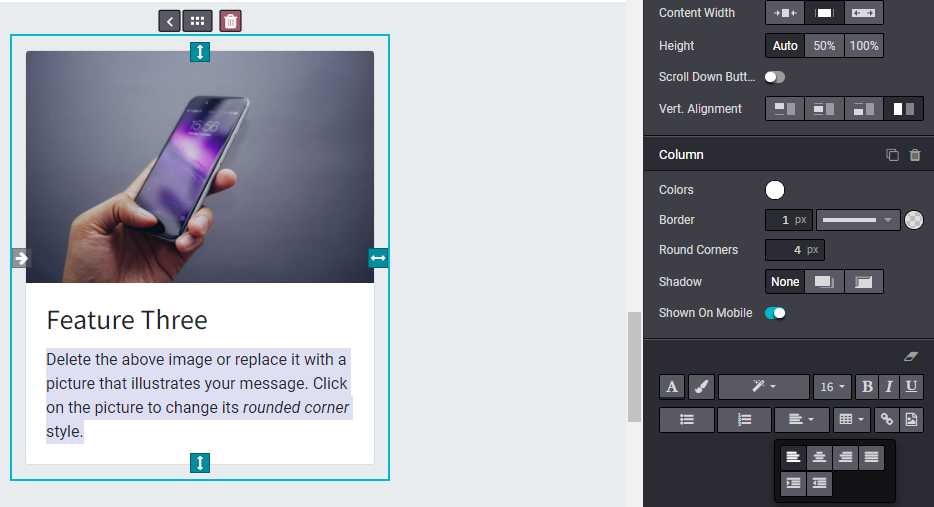
7) Click on any section of the block and edit [e,g. change content etc..]
8) Click on the " Save " button on the right-hand side of the page.
To get more details on how to use the Website Builder, please do contact us at support@metrogroup.solutions
The Website Builder in Metro focuses on simplicity and user-friendly design. While it offers a range of font sizes, it currently does not support custom sizes such as 22 or 37. However, you can choose from a variety of standard font sizes to create an aesthetically pleasing and professional website using Metro.
To get more details on how to use the Website Builder, please do contact us at support@metrogroup.solutions
1) Go to the top left and click on the menu option.
![]()
2) Select the website module.
3) Click on " Go to Website " button.
4) Click on " Edit " on the top-right corner and start editing your website.
5) 5) On the right-hand side, under " Block " section, you will see " Inner Content ". Just drag-n-drop to your main website section .
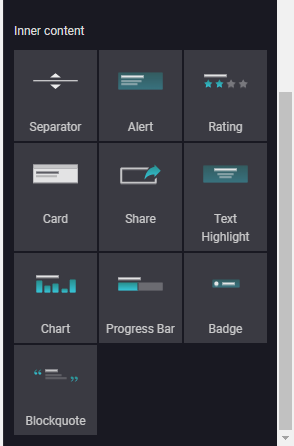
6) Click on any section of the block and edit [e,g. change content etc..]
7) Click on the " Save " button on the right-hand side of the page.
To get more details on how to use the Website Builder, please do contact us at support@metrogroup.solutions
The background shape feature may not be available for certain blocks in the Metro Website Builder due to the functional flow of the software and layout of the page. Our team has carefully designed the software to optimize performance and ensure a seamless user experience.
To get more details on how to use the Website Builder, please do contact us at support@metrogroup.solutions
Yes, with the e-commerce add-on, you can start selling your products on-line. Currently, we support Stripe, PayPal and HitPay for payment processing.
To get more details on how to use the Website Builder, please do contact us at support@metrogroup.solutions
Yes, you can. You can either sign up for an add on for the live chat or simply insert your custom live chat code into your website.
To get more details on how to use the Website Builder, please do contact us at support@metrogroup.solutions
Website Builder has many SEO functions. Here are the commonly used ones:
-
Alt tags
-
Title tags
-
Meta descriptions/keywords
-
Social sharing information
-
Pixel trackers / Tags
-
Keyword analysis
To get more details on how to use the Website Builder, please do contact us at support@metrogroup.solutions
Yes, you can. This will definitely allow you to improve the analytics from your website.
To get more details on how to use the Website Builder, please do contact us at support@metrogroup.solutions
Yes, you can. This is something that many of our customers are using to improve the performance of their ads.
To get more details on how to use the Website Builder, please do contact us at support@metrogroup.solutions
Yes you can!
To get more details on how to use the Website Builder, please do contact us at support@metrogroup.solutions
Our Metro Website Builder integrates with SEO tools to enhance the relevancy of your website content. By combining the power of Metro Website with Google's robust SEO capabilities, we ensure that your website ranks higher in search engine results, driving increased visibility and traffic to your business.
To get more details on how to use the Website Builder, please do contact us at support@metrogroup.solutions
Yes, you can. You add any google analytics code or tag manager code easily into your website.
To get more details on how to use the Website Builder, please do contact us at support@metrogroup.solutions
The Share button, located in the customization menu of Metro Website & E-Share Commerce, serves as a powerful tool to facilitate the sharing of product information across multiple social media platforms.
To get more details on how to use the Website Builder, please do contact us at support@metrogroup.solutions
To ensure a seamless shopping experience, Metro ERP provides a user-friendly interface to manage accessories and alternative goods for each product. Simply access the product form located under the eCommerce tab and specify the relevant details. When customers browse through the shop menu, they will be able to view all alternative items on a single page. Additionally, if a product is added to the basket, our system intelligently suggests compatible accessory products, enhancing the overall shopping experience.
To get more details on how to use the Website Builder, please do contact us at support@metrogroup.solutions
Yes, Metro's Website & E-commerce module offers a solution called "Prevent Sale of Zero Priced Product." This feature allows users to effectively manage products with a price of 0. Instead of displaying the "Add to Cart" button, it replaces it with a "Contact us" button. You can easily configure this feature in the website module settings under Shop - Products.
To get more details on how to use the Website Builder, please do contact us at support@metrogroup.solutions
No, it is not always necessary for customers to have a portal access in order to shop for products on the website. In the Metro website module settings, users have the option to sign in or sign up at checkout with three choices: Optional, Disabled (buy as a guest), and Mandatory (no guest checkout). When "Optional" is selected, guests can register from the order confirmation email to track their order.
To get more details on how to use the Website Builder, please do contact us at support@metrogroup.solutions
Absolutely! With Metro, users have the ability to include additional information by utilizing a customizable form during the checkout process. This convenient feature, called "Extra Step During Checkout," can be easily enabled by navigating to the website and E-commerce settings under Shop - Checkout Process.
To get more details on how to use the Website Builder, please do contact us at support@metrogroup.solutions
The Re-order From Portal feature in Metro ERP enables your customers to easily add products from their previous orders directly to their shopping carts.
To get more details on how to use the Website Builder, please do contact us at support@metrogroup.solutions
Absolutely! Metro ERP offers a convenient feature that allows you to decide what happens when a product is added to the cart. You have three options to choose from:
1) Stay on Product Page: This option keeps the user on the product page after adding the item to the cart, allowing them to continue browsing or make additional selections.
2) Go to Cart: With this choice, the user is automatically directed to the cart page immediately after adding the product. It streamlines the purchasing process by providing a quick overview of the items in the cart.
3) Let the User Decide (Dialog): This option presents a dialog box to the user, giving them the freedom to choose their preferred action. They can either proceed to the cart or remain on the product page.
To get more details on how to use the Website Builder, please do contact us at support@metrogroup.solutions
In Metro Website & E-Commerce modules, we have introduced several new snippets to enhance your website functionality. These include the Donation snippet, which allows you to easily add a donation option to your website. With just a simple drag and drop, you can enable your customers to contribute towards a cause they care about.
Additionally, we have added Embed code snippets, empowering you to incorporate custom HTML code directly into your website. This feature gives you the freedom to personalize and optimize your website according to your specific requirements.
To get more details on how to use the Website Builder, please do contact us at support@metrogroup.solutions
By enabling the Base Unit Price option in Odoo 15 Website & E-Commerce, you can display the price per base unit of measure for your products. This feature allows you to provide more accurate pricing information to your customers. To enable this feature, simply follow these steps: go to Website -> Configuration -> Settings -> Products -> Base Unit Price.
To get more details on how to use the Website Builder, please do contact us at support@metrogroup.solutions
With Metro, you have complete control over the design and layout of your e-commerce website. Our user-friendly interface allows you to easily customize themes, fonts, colors, and more. Create a visually stunning online store that aligns with your brand and captivates your customers.
To get more details on how to use the Website Builder, please do contact us at support@metrogroup.solutions
Absolutely! Metro empowers you to manage multiple online stores from a single centralized platform. Whether you have one store or multiple branches, our robust system enables you to efficiently manage inventory, orders, and customer data across all your stores. Streamline your operations and achieve greater efficiency with Metro Website's multi-store management capabilities.
To get more details on how to use the Website Builder, please do contact us at support@metrogroup.solutions
Absolutely! Metro ERP empowers you to manage multiple online stores from a single centralized platform. Whether you have one store or multiple branches, our robust system enables you to efficiently manage inventory, orders, and customer data across all your stores. Streamline your operations and achieve greater efficiency with Metro website multi-store management capabilities.
To get more details on how to use the Website Builder, please do contact us at support@metrogroup.solutions
To enable authorize.net as a payment option on your Metro Website, follow these steps:
1) Go to Website -> Configuration -> Payment Acquirers in the admin panel.
2) Install the authorize.net payment acquirer module.
3) Configure the module by providing your authorize.net credentials.
4) Save the settings.
Once this is done, customers will be able to choose authorize.net as a payment gateway during the checkout process. They can then proceed to make secure card payments using the selected payment gateway.
To get more details on how to use the Website Builder, please do contact us at support@metrogroup.solutions
Metro Website provides seamless integration with PayPal, allowing you to accept online card payments easily. Follow these steps to configure your PayPal account in Metro:
1) Install the payment acquirer: Start by installing the PayPal payment acquirer module in Metro.
2) Access payment acquirer configuration: Navigate to the Website module, click on "Configuration," and select "Payment Acquirers."
3) Configure PayPal credentials: Locate the PayPal payment acquirer and enter your PayPal account credentials, including your API username, API password, and API signature.
4) Save the configuration: After entering the necessary details, save the configuration to activate the PayPal integration.
Once you have completed the configuration, you can utilize the PayPal gateway during the checkout process to enable online card payments for your customers. This integration provides a secure and convenient payment option, ensuring a smooth experience for both you and your customers.
To get more details on how to use the Website Builder, please do contact us at support@metrogroup.solutions
Yes, absolutely! We have made it convenient for you to make payments on our website using credit cards. To ensure smooth transactions, we have activated and integrated various payment acquirers such as Ayden, Paypal, Authorize.net, Buckaroo, Stripe, and more. So you can choose the payment method that suits you best and complete your purchase hassle-free.
To get more details on how to use the Website Builder, please do contact us at support@metrogroup.solutions
To manage customer accounts in Metro, follow these steps:
1) Go to the Metro Website and navigate to the Configuration section.
2) Click on Settings, and under the Feature One tab, you will find options to manage customer accounts.
3) Choose between two account management options: 'On Invitation' or 'Free Sign Up'.
4) If you select 'On Invitation', customers will be able to log in only with an invitation received via email. This ensures secure access to their accounts.
On the other hand, if you choose 'Free Sign Up', any user can create an account. This allows them to access and view all their invoices, documents, sales orders, projects, and more.
To get more details on how to use the Website Builder, please do contact us at support@metrogroup.solutions
With Metro Website, you can enhance your website with additional features. Our platform allows for seamless customization, configuration, and integration of various functionalities. You can easily incorporate features such as multilingual support, domain name customization, social media integration, customer portal mode, and much more.
To improve your website's functionality, Metro Website offers a range of flexible options to cater to your specific needs and preferences.
To get more details on how to use the Website Builder, please do contact us at support@metrogroup.solutions
In many countries, it is common practice to include taxes in the price of a product or service. With Metro ERP, you can easily set prices that are inclusive of all taxes. Simply activate the "Included in price" option under the accounting taxes settings. This feature ensures that your prices are transparent and comprehensive, providing a seamless experience for your customers.
To get more details on how to use the Website Builder, please do contact us at support@metrogroup.solutions
With Metro Website's pricelist feature, you can easily apply different prices to customers based on their location. Here's how you can do it:
Get started by accessing the Website configuration settings in Metro Website and enable pricelists.
Once pricelists are enabled, you can proceed to create a new pricelist. To do this, navigate to Website -> Products -> Price Lists -> Create.
Within the pricelist creation page, you have the flexibility to add a new price for all products, product variants, or for a specific product.
Additionally, you can also apply pricelists to partners based on their country. Simply go to the partner form under the Sales & Purchase tab and assign the appropriate pricelist.
By setting up pricelists and assigning them to specific customers or partners, your website visitors will be able to view product prices tailored to their assigned pricelist.
To get more details on how to use the Website Builder, please do contact us at support@metrogroup.solutions
To publish a page on multiple websites using Metro Website, follow these steps:
1) Create a page: Start by creating a page on your desired website. Customize it with the content and design you want to display.
2) Duplicate the page: Once you have created the page on one website, use Metro Website's intuitive interface to duplicate it.
3) Publish on other websites: After duplicating the page, you can easily publish it on other websites connected to Metro ERP. This feature allows you to maintain consistency across multiple platforms while saving time and effort.
By duplicating and publishing the page, the original page remains intact, ensuring that it stays available on the original website.
To get more details on how to use the Website Builder, please do contact us at support@metrogroup.solutions
features for this?
Metro ERP offers an advanced feature called Tax Cloud to address this requirement. Inspired by the successful implementation in it, Tax Cloud is a powerful tool integrated within our software. It enables you to accurately calculate sales taxes for various locations across the US. Moreover, it allows you to easily identify products that are exempt from taxes and track locations with tax exemptions. With real-time tax computation capabilities, Metro Website ensures seamless and accurate tax management.
To get more details on how to use the Website Builder, please do contact us at support@metrogroup.solutions
Metro now includes a cutting-edge feature called Plausible Analytics in its website module settings. Plausible Analytics is an open-source initiative designed to enhance web analytics while prioritizing user privacy.
To get more details on how to use the Website Builder, please do contact us at support@metrogroup.solutions
Yes, you may easily configure menus and submenus on the Website. This will allow you to keep your website neat and allow users to navigate your website easily.
To get more details on how to use the Website Builder, please do contact us at support@metrogroup.solutions
Yes. All websites are built responsive by default. In fact you can even preview what the pages look like before they go live.
To get more details on how to use the Website Builder, please do contact us at support@metrogroup.solutions
With Metro Website, we've got you covered when it comes to taxes. Our cutting-edge feature, Tax Cloud, takes care of tax calculations seamlessly. Originally designed for the US market, Tax Cloud has been successfully implemented in Metro ERP. It enables you to effortlessly compute sales taxes for different locations across the United States. Additionally, Tax Cloud allows you to identify tax-exempt products and keep track of locations with tax exemptions.
To get more details on how to use the Website Builder, please do contact us at support@metrogroup.solutions
Yes, you can easily change the language on the website and attract more visitors for your website.
To get more details on how to use the Website Builder, please do contact us at support@metrogroup.solutions
If you already have an existing domain and website, you can easily move it over to Metro Website Builder. If you feel uncomfortable doing it on your own? Contact us to refer to you our agency partners for assistance and they can help you transition seamlessly.
To get more details on how to use the Website Builder, please do contact us at support@metrogroup.solutions
It is a Python-based open-source ERP platform that also contains a website builder module. Python is a scripting language that can be used for a variety of purposes. JavaScript is a cross-platform programming language that is lightweight and object-oriented. It is commonly used in web pages.
To get more details on how to use the Website Builder, please do contact us at support@metrogroup.solutions
It is built in such a way that it avoids the most frequent security flaws from being introduced: SQL injections are avoided by employing a higher-level API that does not necessitate manual SQL queries.
To get more details on how to use the Website Builder, please do contact us at support@metrogroup.solutions
There is no catch. Metro Website Builder is a tool that allows you to edit your website and keep it fresh with latest content always.
To get more details on how to use the Website Builder, please do contact us at support@metrogroup.solutions
Metro Website Builder offers free website training classes through our partners. You can feel free to join any of our training classes and learn how to use the system. Sign up for the free trial by clicking Here.
To get more details on how to use the Website Builder, please do contact us at support@metrogroup.solutions
Metro Website Builder comes with a 21 day free trial of the system. During this time, you can try the system, evaluate whether it works for your business and join our free courses to learn how to use the system. Sign up for the free trial by clicking Here.
To get more details on how to use the Website Builder, please do contact us at support@metrogroup.solutions
Great! Your agency or freelancer can continue to build and manage your site. You can also make urgent edits and amendments when needed. You will be able to make more frequent edits to your website at a lower cost. This will definitely allow your website to be more fresh with latest content available at all times.
To get more details on how to use the Website Builder, please do contact us at support@metrogroup.solutions
Yes, of course you can. Metro Website Builder has an easy to use drag and drop editor for you to build your website with ease. You do not need to know any programming and can start straight away.
To get more details on how to use the Website Builder, please do contact us at support@metrogroup.solutions